설치 중 분무기가 있는 주방 싱크대 수도꼭지 간단한 일처럼 들릴 수 있지만, 끔찍한 골치 아픈 일이 될 수도 있습니다.
그러므로 누수와 같은 일반적인 문제를 피하기 위해 작업 중에 주의하는 것이 중요합니다.
어떻게 해야 할지 모르겠나요? 당황하지 마세요. 이 가이드는 분무기가 있는 주방 싱크대 수도꼭지를 선택하고 설치하는 방법을 알려드립니다!
쉬운 목차
비녀장분무기가 있는 올바른 주방 싱크대 수도꼭지를 선택하세요
물론, 분무기로 새로운 주방 싱크대 수도꼭지를 설치하기 전에, 당신은 옳은 것을 찾아야만 합니다!
고려해야 할 요소가 많이 있습니다. 예를 들어,
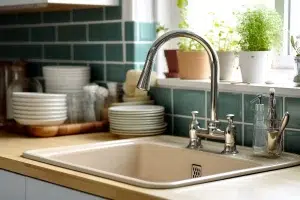
높이와 아치
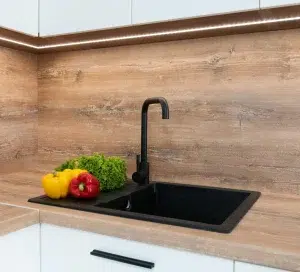
큰 냄비와 주방용품이 있는 경우에는 높은 수도꼭지가 좋고, 주방 공간을 절약하려면 낮은 수도꼭지가 좋습니다.
주방에서 호가 균형 잡혀 있는지도 고려하세요. 수도꼭지 머리가 싱크대 중앙에 닿으면 이를 알 수 있습니다.
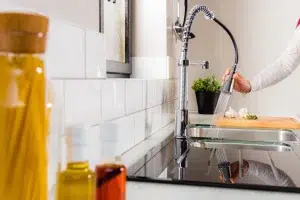
풀아웃 스프레이어 또는 풀다운이 있는 주방 수도꼭지
풀다운 스프레이어가 있는 주방 싱크대는 머리 부분을 아래로 당길 수 있기 때문에 깊고 큰 싱크대에 적합합니다.
조리대 위에 있는 화분 등의 물체를 채울 때 사용하기 이상적인 수도꼭지는 풀아웃 분무기입니다.
필요한 도구를 준비하세요
분무기로 주방 싱크대 수도꼭지를 쉽게 설치할 수 있는 적절한 도구가 있는지 확인하세요. 여기에는 다음이 포함됩니다.
- 파이프렌치
- 배관공용 테이프(선택 사항)
- 분지 렌치
- 양동이 또는 수건
- 조정 가능한 렌치
- 안전 장갑과 고글 (안전이 최우선!)
- 당신의 새로운 분무기가 있는 주방 싱크대 수도꼭지
이러한 도구를 갖추면 아래에서 살펴볼 다음 중요한 단계로 나아가는 데 도움이 됩니다.
오래된 수도꼭지를 단계별로 제거
- 물 공급을 끄거나 공급 라인을 분리하세요
주요 수도 밸브나 온수, 냉수관이 어디에 있는지 찾아서 잠근 다음 수도꼭지를 열어 남아 있는 물을 빼세요.
조절식 렌치나 파이프 렌치를 사용하여 수도꼭지에서 라인이나 파이프를 분리하는 동안 떨어지는 물을 받기 위해 아래에 양동이를 놓으세요.
- 장착 너트를 제거하세요
세면대 렌치를 사용하여 수도꼭지를 세면대에 고정하는 너트를 제거하세요.
- 오래된 수도꼭지나 분무기를 꺼내세요
비올라! 싱크대에서 오래된 수도꼭지나 분무기를 조심스럽게 제거할 수 있습니다.
- 싱크대 청소
새로운 주방 싱크대 수도꼭지를 분무기로 설치할 준비를 하기 위해 싱크대 주변을 청소하여 먼지와 오래된 접착제를 제거하세요.
분무기로 새로운 주방 싱크대 수도꼭지 설치하기
- 실리콘을 넣어주세요
수도꼭지 주변에 '실리콘'이라는 접착제를 바릅니다.
물이 수도꼭지 아래로 새는 것을 방지하려면 분무기를 갖춘 새로운 주방 싱크대 수도꼭지를 설치하기 전에 최소 24시간을 기다리세요.
- 새로운 수도꼭지를 삽입하세요
새로운 주방 수도꼭지의 호스를 오래된 수도꼭지를 제거한 싱크대 구멍에 맞춰서 넣어주세요.
- 수도꼭지를 고정하세요
수도꼭지의 너트나 와셔를 싱크대 밑에 놓고 조이면서 수도꼭지가 똑바로 세워지도록 합니다.
- 분무기 호스를 부착하세요
분무기 호스를 수도꼭지 본체 내부에 있는 분배 밸브나 주둥이에 꽂으세요.
- 공급 라인 연결
공급 라인을 해당 파이프에 다시 연결하고, 견고한 밀봉을 위해 배관공용 테이프를 감는 것을 고려하세요.
- 분무기 헤드 고정
분무기 헤드를 내부 호스에 맞춘 후 시계 방향으로 반복해서 돌려 조입니다.
분무기로 주방 싱크대 수도꼭지를 점검하세요
물을 다시 돌려서 누수가 있는지 확인하세요. 분무기가 달린 주방 싱크대 수도꼭지.
누수가 있는 경우 분무기 헤드, 호스 및 수도꼭지 본체 등 모든 부품을 서로 조이십시오. 설치 방법에 대한 추가 도움이 필요하십니까? 분무기가 달린 주방 싱크대 수도꼭지? 우리는 동영상 귀하에게 더욱 도움이 되도록!